Thursday, 30 June 2016

Steps to Import .docx in Your WordPress Blog


There are a lot of people who like to write in Microsoft Word rather than writing on the WordPress editor directly. Moreover, those who wish to import the .docx document in their WordPress and do not wish to copy or paste the document makes the formatting quite bad.

Moreover, with the amount of blogs that we need to put in to the website we can say that  We do certainly need a professional WordPress developer for technical task, but here i have put in efforts to make you understand the process of importing. In this blog, we will discuss how to import the .docx documents in a WordPress website without botching up with the formatting. 

Converting Docx to WordPress

Make sure to import properly .docx Files in your WordPress website. There are several users that prefer to write down their articles that are present in Microsoft Word that offer an inbuilt thesaurus, spell check,  styles, templates, and formatting.

Wherein, WordPress's default visual editor do not offer all these features. Moreover, guest blogging is another possible usage scenario which is required for the development.

There are various publishers that do not want to give guest writers access to the admin area of their WordPress; then they have to receive their guest posts either using the normal HTML as well as a .docx document.

At the end of this, you might require already have some content which is saved in .docx documents. Now the next step if Copying, as well as pasting from the docx file, will be a little difficult, especially if you need to copy the content from more than one document.

Keeping this in mind let us see how one can properly import .docx documents in their WordPress without breaking the formatting.

The next step is to Import .docx Documents in your WordPress

The very first thing you need to do is install and activate the Mammoth .docx which is a converter plugin. Make sure that you know the step by step guide on how to install a plugin. 

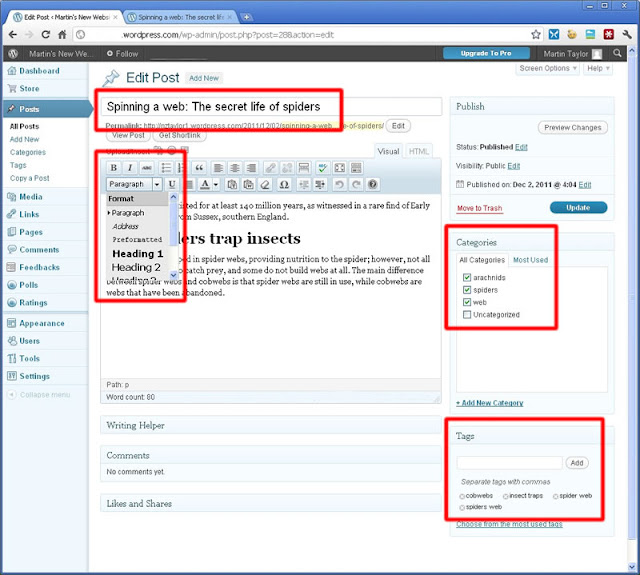
After activation, make sure that you create a new post or one can even edit a new one. Looking at the edit screen, you will get the Mammoth .docx converter meta box which is present below the editor.

Use the Mammoth docx converter for your WordPress

All you need to do is click on the choose file button so as to select the .docx file which is needed in the computer. After selecting the .docx file, the plugin will depict the three views for the documents.

In the Visual tab, it will help you see the document on your WordPress website. You will notice that it will ignore any styles applied to your .docx documents such as background color, text color, margin, padding, etc.

Rather than this, it will allow your theme’s stylesheet to control the display items on your screen. 

This also allows you to view the HTML, which was generated by the converter, and this can be done by just clicking on the button that says Raw HTML. Make sure to click on the messages button in order to check out any warnings or errors that one gets on the conversion.

You can check the look of the documents, and if you are satisfied with the way how the document appears in the visual tab, then it allows you to click on the ‘Insert into editor’ button. The plugin will allow you to insert you converted HTML in the post editor of your WordPress post.

Now you can keep on working on the post.
Wednesday, 15 June 2016

Applying Conditions to Menu For WooCommerce Subscribers


Have you been planning on starting up a WordPress powered membership site? Well, then you might have heard of the difficulties associated with creating membership sites with WordPress. Thankfully, building a membership site using WooCommerce can make the task considerably easier.

But remember, once you've created a membership site it's imperative that everything on your site oozes exclusivity for your logged-in users or WooCommerce subscribers. Thankfully, many plugins are available online that renders the ability to control the pages or portions of your website content that you want to show to active subscribers and hide from inactive subscribers.

Understanding the need to show/hide menu items


Of course, if you don't want certain pages to be accessed by non-members (or non-logged in users), you won't want those pages to be displayed in your site's navigation menu as well. Likewise, there will be some pages that might not be of much use to members. For instance, the pages that sell WooCommerce subscription products and/or services to guests aren't useful for active subscribers. And so, it's better to keep such pages hidden from the subscribers.
In essence, for a membership site, you should consider adding conditional logic to show or hide menu items based on user role. After all, it isn't a good practice to make your members (or active subscribers) shuffle around the content every time they visit your site. Rather, you should make it easy for your members to find quickly the features and services they've signed up for. In short, you must make your site's navigation menu more member focused.

So, what's the solution?

This is where the “If Menu” plugin comes in handy. The plugin helps in controlling the navigation menus for members. Through this tutorial, I'll help you learn how you can create a menu adjusted for your active WooCommerce subscribers. Also, you'll get to know about the plugin and how it can be used to determine whether a subscriber has an active or inactive subscription. In reference to this post, we'll be using the following two plugins:

  • If menu plugin
  • WooCommerce Subscriptions

Note: Before proceeding with the process of using both of the above mentioned plugins, make sure that they're installed on your site.

Let's get started

For adding conditional logic to menu items you'll need to configure:

  • Active or inactive roles of your WooCoomerce subscribers.
  • Menu items for members (i.e. active subscribers)
  • Menu items for guests (i.e. non-logged in users)

A list of sample memberships included in the image.


Let us now have a detailed overview of all the above listed key points one by one:


Step 1 – Configuring Active / Inactive Roles of WooCommerce Subscribers

Before you configure the menu items for your WooCommerce subscribers, you'll first need to set up the roles of active or inactive subscribers. For this purpose, click on the WooCommerce option from your WP admin navigation menu. Next, click on the Subscriptions tab, and from here set up the active/inactive subscribers roles.

Bear in mind; active subscribers are assigned the “Subscriber” role, and inactive subscribers are assigned the “Customer” role by default as shown in the below image:


Note: You can also choose to set up custom roles for your subscribers, by using WordPress plugins such as User Role Editor.

Keep in mind that the roles we'll assign to active and inactive subscribers will help us in showing or hiding certain menu items.

Step 2 – Configuring Menu Items for Active WooCommerce Subscribers

So, now that you have set up the roles of active (and inactive) WooCommerce subscribers, next you need to decide which menu item you would like to show to your active subscribers. Here, we'll need to make use of the If Menu plugin.

The 'If Menu' plugin lets you show/hide your website primary navigation menu items on the basis of conditional statements, such as user roles, whether a user is logged-in or not, etc. But, to make use of the plugin, you'll first have to make sure that the plugin is enabled.

As soon as the plugin gets enabled, a new checkbox option labeled “Enable Conditional Logic” will be added to each menu item. For this, go to Appearance → Menus, and from there you can start making edits to your navigation menus.

Next, click on any of navigation menu item and then make the ‘Enable Conditional Logic’ checkbox checked. And then, you just need to select whether you would want to show or hide the selected menu item. You will then need to choose any one of the corresponding conditions from the drop down box.

Since we need to show particular menu item just to your active subscribers, we have to choose to show the “Subscriber-only” page link only if “User is Subscriber”:

Once you have selected a condition, just hit the “Save Menu” button.

Step 3 – Configuring Menu Items For Non-Logged in Users

In this section, we'll talk about the process of showing your menu items to guests (or non-logged in users) of your membership website. To do so, you just need to click on the “Hide” option if the corresponding condition is set to “User is logged in.”

Click here, to get more information about subscription


Wrapping Up

Apart from making your membership website pages or part of the content to members, you should also consider adjusting the navigation menu items based on user statuses. Doing so will save the time and efforts of your active subscribers directly shuffle through the useful pages that can be accessed by them. Likewise, you don't necessarily need to show the pages that cannot be accessed by guests or inactive subscribers.

Hope this post will guide you in controlling the navigation menu items of your WordPress membership site with utmost efficiency.

Thursday, 2 June 2016

Subscribers aren't enough. Who is reading your Blog?


Well, that's not enough if you own a blog and publishing content on regular intervals. Understanding your audience and keeping a check on them regularly is a crucial step to success. It assists in learning and helps to find out which blog page are very popular among the users. How do the users land on those blog pages? And what else entertained the user?

Undoubtedly, blogging is a huge pond for bloggers to dive. And WordPress is a significant platform to reach millions of audiences across the globe. So here in this article, we shall discuss how to find out who reads your blog and who are the subscribers to your WordPress blog.

Understanding about Google Analytics

Google Analytics is a freemium web analytics service which is offered by the tech giant, Google. It tracks the visitor's site and reports about RSS feed subscribers. First, one is required to visit the Google Analytics websites and signup for an account.

Setting up Google Analytics for WordPress using MonsterInsights

To set up this MonsterInsights plugin you do not need to hire a WordPress developer for it. It is a simple and a quick procedure for the same. And if you've already installed this plugin then you may skip this step.

After installing the plugin, you need to install and activate the Google Analytics by MonsterInsights plugin. Here is a simple guide to building a WordPress plugin.

At the time of activation, you need to visit Insights > Settings page and click on ‘Authenticate with your Google account’ button. It will open a dialog box which will ask you to give permission to the Google Analytics plugins to access the users Google account. You may proceed by clicking the allow button.

Once you are done with this, the plugin will now fetch your account settings from your Google Analytics account. Now you need to select your analytics profile by clicking on select a profile. You may now click to save the changes icon to save your settings.

How to track RSS Links in Google Analytics

In addition to tracking visitors on your website, Google Analytics can also track links to your website from other sources like your RSS feed, email newsletter, social links, etc.

You can add your URL parameters in case you're sharing links manually. Although WordPress automatically generates the links in your RSS feed and newsletter.

You may track your RSS feed links using the Google Analytics by MonsterInsights plugin in WordPress. You may proceed with the following procedure.

To visit the Settings click on to Analytics > Settings in the WordPress admin section and click on the Advanced tab. Check the box next to ‘Tag links in RSS feed with campaign variables’ option and click on the save changes button.

That's all!

Find the subscriber Information

The first major step to find subscriber information is to give your users the ability to subscribe to your blog through an email newsletter. The two primary email marketing platform among our users are MailChimp and AWeber. Both of the subscribers come with its own built-in analytics.

I hope this blog has helped you find who reads and subscribes to your WordPress blog.