Showing posts with label Developer. Show all posts

Thursday, 12 January 2017

Which one is the best: WordPress vs Blogger

WordPress and Blogger are the two major platforms which can support media & text heavy blogs. They both offer a plethora of features and functionalities that sometimes confuse the new bloggers. Although these two offer eye-catching designs, but the best blogging platform for novice bloggers might not be the best one of the advanced bloggers. Another deciding factor you need bear in mind is the purpose of building a blog.


In this article, you read a comparison of WordPress and Blogger services as well as the list of features that are divided into pros and cons.

WordPress

Created just a year before Google acquired Blogger, WordPress has proven to be the real game changer. With its services such as HTML to WordPress conversion, features, tools and functionalities, WP serves as a perfect platform for blogging and web development. Its simplistic style was welcoming for the users who wished their photos & written content get promoted in right manner. The WP is an open-source tech and is based on the codes of PHP & MySQL.

Pros

Being a self-hosted blog, the users get more control over the appearance, functionality and content that they want to publish on the blog. Moreover, the users also get their own domain name that seriously looks more professional than a blogspot.com sub-domain which you can get from Blogger.

Cons

The technical requirements to setup a self-hosted WP blog is a little more advanced than those of the Blogger. Along with that, you need to pay for the hosting but this comes in quite cheap as low as $3 per month.

Blogger

Since tech giant Google owns the Blogger, the company offers several Google's built-in features such as Adsense, Analytics and Adwords, which makes it extremely useful for the novice bloggers. Originally started in the year 1999, Blogger was the first one in the web sphere to launch a user-friendly interface that helped in boosting collection of blogs on the internet. The Blogger didn't change much and they specialize in an interface that is easy to use for bloggers.

Pros

Blogger's first advantage is that its free which is good especially for amateur bloggers who don't expect much traffic at first. It is easy to use and offers a step by step instructions. Blogger definitely delivers a user-friendly interface with widgets which are easy to customise and master. Besides, Blogger also hosts a broad spectrum of free templates so the users can modify the appearance as per the viewer's experience and can build a visual presence that keeps their brand consistent & reliable.

Cons

While Blogger offers many basic features, but for the advanced level bloggers, these functionalities seem to be useless. Several professionals complain about losing their template customization. While the simple interface is attractive to novice players but it is not good for everyone. Several other things such as post editing options and minimal comments options are also missing for this portal.

Conclusion
It completely depends on your requirements based on this you will choose the portal for your blogging and web development needs.

Thursday, 2 June 2016

Subscribers aren't enough. Who is reading your Blog?


Well, that's not enough if you own a blog and publishing content on regular intervals. Understanding your audience and keeping a check on them regularly is a crucial step to success. It assists in learning and helps to find out which blog page are very popular among the users. How do the users land on those blog pages? And what else entertained the user?

Undoubtedly, blogging is a huge pond for bloggers to dive. And WordPress is a significant platform to reach millions of audiences across the globe. So here in this article, we shall discuss how to find out who reads your blog and who are the subscribers to your WordPress blog.

Understanding about Google Analytics

Google Analytics is a freemium web analytics service which is offered by the tech giant, Google. It tracks the visitor's site and reports about RSS feed subscribers. First, one is required to visit the Google Analytics websites and signup for an account.

Setting up Google Analytics for WordPress using MonsterInsights

To set up this MonsterInsights plugin you do not need to hire a WordPress developer for it. It is a simple and a quick procedure for the same. And if you've already installed this plugin then you may skip this step.

After installing the plugin, you need to install and activate the Google Analytics by MonsterInsights plugin. Here is a simple guide to building a WordPress plugin.

At the time of activation, you need to visit Insights > Settings page and click on ‘Authenticate with your Google account’ button. It will open a dialog box which will ask you to give permission to the Google Analytics plugins to access the users Google account. You may proceed by clicking the allow button.

Once you are done with this, the plugin will now fetch your account settings from your Google Analytics account. Now you need to select your analytics profile by clicking on select a profile. You may now click to save the changes icon to save your settings.

How to track RSS Links in Google Analytics

In addition to tracking visitors on your website, Google Analytics can also track links to your website from other sources like your RSS feed, email newsletter, social links, etc.

You can add your URL parameters in case you're sharing links manually. Although WordPress automatically generates the links in your RSS feed and newsletter.

You may track your RSS feed links using the Google Analytics by MonsterInsights plugin in WordPress. You may proceed with the following procedure.

To visit the Settings click on to Analytics > Settings in the WordPress admin section and click on the Advanced tab. Check the box next to ‘Tag links in RSS feed with campaign variables’ option and click on the save changes button.

That's all!

Find the subscriber Information

The first major step to find subscriber information is to give your users the ability to subscribe to your blog through an email newsletter. The two primary email marketing platform among our users are MailChimp and AWeber. Both of the subscribers come with its own built-in analytics.

I hope this blog has helped you find who reads and subscribes to your WordPress blog.


Friday, 6 May 2016

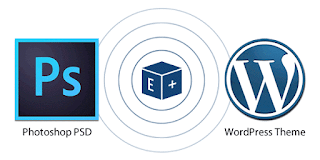
Need of Custom PSD to WordPress Coding


When you are about to enter into the web development world to take your business on mobile you need to remember that crux of developing an incredible website , which is: Firstly, make the design interface attractive yet not a maze for the users. Secondly, make sure that the code for your website is quite functional and efficient.


Both these components work in together to render an incredible websites and one is incomplete without the other and you cannot cut slack in any of the two if you want to have a good website.

May people think that creating a good web design is a matter of sheer technical expert but it is quite an artistic job which requires great creative acumen which is quite a rare species;


However the other phase of web design which is converting it into intuitive web enabled components require you to have brilliant coding skills and a strong grasp on web languages such as HTML, PHP, CSS and JavaScript.


This brings to us the conclusion that creating a PSD image of your design is quite an easy but technically coding it into a workable and functional website is an arduous task.


WordPress is a blessing for those who do not have a good hand at programming, being an open source community has gifted or, an open source tool for developing websites quickly and is quite an effective content management system which is great user friendly quotient and can be used efficiently to create a quality website.


Though it is quite easy, but you need to focus on WordPress web development process as it is no cake walk to create a custom website. Those who are not sure about how to go about the process of PSD to WordPress Conversion can read along to get a lucid picture:


Step 1: Slice your PSD images


The process of PSD to WordPress conversion begins with slicing. Slicing implies cutting and dividing the design file of an image into several small files designs in which they will have different component of the holistic design. This process holds quite an important as no one can code the complete design in one single image. One single web design is a unit that comprises of multiple images interviewer seamlessly, and each and every component and design feature render a purpose and functionality of its own.


Step 2: Style.css and Index.html


Following that step is the coding process in which the sliced images are coded into HTML or XHTML web format and designers use CSS to style them. For this process the designers need to have strong hold on languages such as CSS and HTML.


To accomplish this purpose developers make softwares such as Fireworks and Dreamweaver, which are developed to create websites, however on top of it, it is totally dependent on the programmer what they prefer to use.


Step 3: Creating WordPress Theme


When it comes to the process of developing a WordPress website it is actually converting the WordPress theme which is then uploaded into a WordPress software.


Which means the prime focus of converting a PSD image to WordPress process implies to create a PSD image into a WordPress theme and then after making it functional using the tools and plugins to make it a fully functional website.


Thus in order to develop an extremely intelligent WordPress website, you need to design your basic HTML file as per the basic file structure of WordPress theme’s and then breaking down your HTML file into multiple HTML files that fits into the structure of the file.


WordPress comprises of several PHP files for instance Header.php,archive.php, Index.php, Footer.php, page.php, single.php, category.php,Sidebar.php, 404.php, search.php, comments-popup.php and comments.php.


Step 4: WordPress tags


WordPress offers numerous intrinsic functions that one can leverage to add basic functionalities onto your WordPress theme. This do not requires the developer to deal with complex HTML codes. All you need to do is to just incorporate inbuilt functions of WordPress into your theme files and incorporate the requisite functionality to get your job done.


Step 5: Make it functional


As we have now completed the task of creating and activating a theme, you can get to see the complete benefit of your WordPress CMS platform. For those who wish to get any other functionality in their website, or alter a functionality that already you need to just install a plugin or can use the WordPress dashboard to alter the existing structure.